Insights & News
TECH 21 NYC
TECH 21 NYC
OFFICIAL BLOG
Discover tone secrets, SansAmp technical guides, artist setups, and industry news from the pioneers of analog amp emulation.
Master your guitar and bass tone with deep dives into DI recording, direct amp simulation, and rig setups.
Behind the scenes with world-class bassists and guitarists relying on Tech 21 equipment live and in studio.
Choosing a Bass Preamp Pedal starts with understanding what your current setup is missing. You may want tighter low end, a more flexible EQ, a driven sound, or a direct output for a mixer. The right choice depends on your bass, amplifier, playing style, and typical venues—not just a list of features.
Small differences matter. A pedal that sounds full through headphones may respond differently through a loud cabinet. Consider its input and output connections, EQ range, noise level, and whether it includes a DI output or speaker simulation. If you play with multiple basses, check how easily its controls adapt to different pickups. Read the specifications, then listen to trustworthy demonstrations using familiar instruments and settings. When possible, test the pedal with your own rig.
Keep the practical details in view. Is the layout easy to adjust between songs? Does it need a separate power supply? Will it fit on your board? A higher price does not guarantee a better match, and extra controls can be distracting if you rarely use them. That sounds simple. It isn’t always. Personal preference can make comparisons messy, so judge tone at realistic volume and avoid relying on one quick demo. This guide will explain the main features, common trade-offs, and questions worth asking before you buy. The goal is not a perfect pedal for everyone. It is a well-informed choice for your sound and working setup.
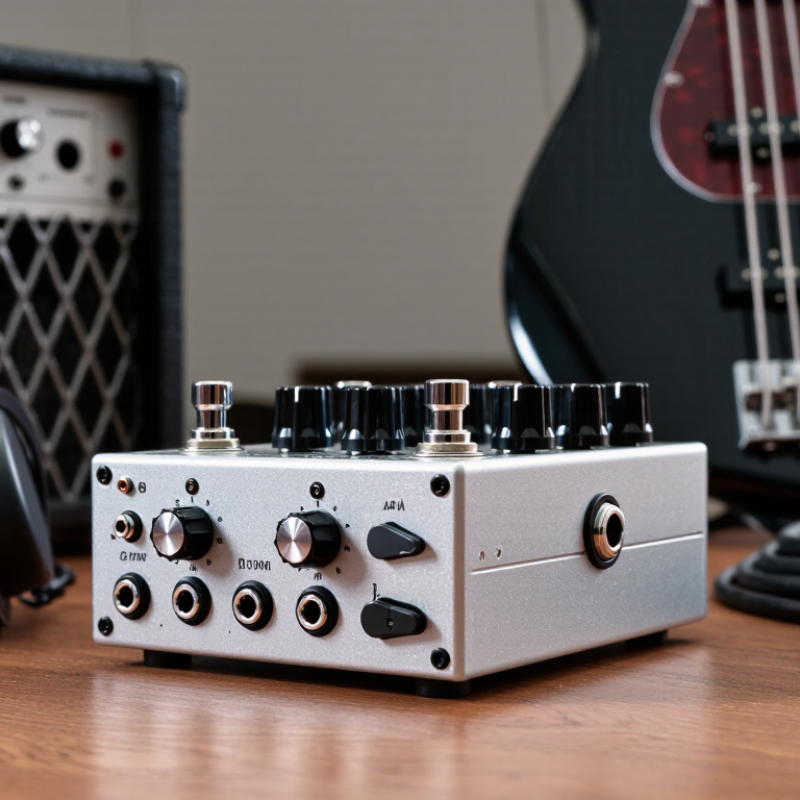
A bass preamp pedal shapes the signal before it reaches an amplifier, recording interface, or mixing desk. It can add gain, adjust tone, and help a bass sit more clearly in a mix. Think of a quiet rehearsal room: a few careful EQ changes may bring out the low notes without making the strings sound harsh. The pedal can also help match your instrument’s output to different equipment. That matters.
Features vary. Some preamps include a direct output for sending a signal to a mixer, while others focus mainly on tone and gain. A built-in drive circuit can add grit, but more gain is not automatically better. Too much may blur note definition, especially with a low-string riff. I have found that small adjustments are often easier to judge than dramatic changes.
A preamp is useful when your bass sounds different through several setups, or when you need quick control onstage. It is less essential if your amplifier already gives you the tone and connections you need. Listen at rehearsal volume, not only through headphones; room acoustics can change what seems balanced. Not always. A subtle midrange adjustment may help more than a deep bass boost, though the right setting depends on your instrument, playing style, and band.
Start by describing the sound you want in practical terms. Do you need rounded lows for fingerstyle playing, or a sharper attack that stays clear with a pick? Listen to your bass through the amplifier you use most. Pickup type, playing touch, and room acoustics can all change how a preamp’s EQ feels. A low-mid boost may add weight in a quiet room, yet sound muddy on a loud stage. Small differences matter.
Think about where and how you perform. For direct recording or a venue’s mixing desk, a balanced direct output can simplify setup. Check whether you need ground lift, cabinet simulation, or an output that can feed both an amplifier and a mixer. If you switch between passive and active basses, note how much input headroom you need. Clipping can be useful as an effect, but unwanted distortion is harder to fix later. That matters.
Test controls with your own playing, not only with a polished demo. Set the pedal at rehearsal volume, then play softly and dig in. Does the low end stay firm? Can you hear each note when the drummer gets louder? Keep it simple. Too many EQ options can slow adjustments between songs, though a limited control layout may leave one troublesome frequency untouched. Write down settings that work, and revisit them after a different room or instrument changes the sound.
Choosing a bass preamp starts with its job: shaping tone, driving a long cable, or sending a clean signal to a mixer. A one-channel preamp suits simple setups; models with separate clean and drive paths offer more contrast onstage. EQ layout matters, too. A sweepable mid control can target a boxy 500 Hz area or add definition near 1 kHz. Small knob labels are easy to misread under dim stage lights.
It happens.
Check the input impedance and outputs before buying. A high-impedance input, commonly around 1 MΩ, helps avoid loading passive pickups; verify the actual specification. A balanced XLR output is useful for a direct connection to a mixing console, while a ¼-inch output can feed an amplifier. Ground-lift switches may help with hum, but they do not fix every noise problem.
Grand View Research estimated the global musical-instrument market at US$17.3 billion in 2023, with projected growth through 2030. That market figure reflects broad demand, not preamp quality, so compare features rather than treating growth as a buying signal.
Test the unit with your bass, cable, and intended destination. Specs can’t capture everything.
A preamp can sound excellent alone and still clash with your bass. Check whether your instrument has passive or active pickups. Passive pickups often benefit from a high-impedance input, commonly around 1 MΩ, to avoid dulling their attack. Active basses may deliver a hotter signal, so look for adequate input headroom and an input pad. Play hard, then listen for gritty clipping. It can masquerade as warmth.
Map the whole chain before buying. Note the tuner, wireless receiver, compressor, preamp, and amplifier input; each adds a level and impedance change. Compare the pedal’s input and output specifications with those of nearby devices, rather than assuming every “instrument” jack behaves alike. Check whether its output is instrument-level, line-level, or balanced DI, and confirm the next device accepts that format. Small labels matter. A long cable after a high-impedance output can also soften treble, so test with your actual cable length. For a balanced output that hums, the Audio Engineering Society’s AES48-2019 standard covers grounding and electromagnetic compatibility in audio equipment. Still, ground-lift switches are not magic. I once blamed a pedal for noise that came from a poorly seated cable; testing one connection at a time is less exciting, but more reliable.
A bass preamp pedal has to survive more than a quick shop-floor test. Check the enclosure for flex, inspect the jacks, and turn every knob slowly. Loose controls or a scratchy socket can become irritating after months of rehearsals. Feel the switches. A solid footswitch should engage cleanly without rocking the pedal across the floor. If you carry gear often, consider weight, battery access, and whether the knobs are protected inside the pedal’s edges. Small details matter.
Set a realistic budget by counting the extras, not just the pedal. You may also need a reliable power supply, cables, or a board attachment. Then test the preamp with your own bass and amplifier, if possible. Listen at rehearsal volume: a bright sound alone can seem impressive, yet disappear when guitars and drums enter. Check whether the controls make useful changes without sudden volume jumps. A practical layout is easy to adjust between songs, even under dim stage lights. There is a trade-off, though: more knobs offer flexibility but can slow down decisions. An inexpensive pedal may suit a simple setup; paying more is worthwhile only when the added features solve a real problem. It is easy to overvalue extra options.
| Pedal Type | Typical Price Range (USD) | Build and Controls | Common Connections and Features | Practical Strengths | Potential Limitations | A Good Fit For |
|---|---|---|---|---|---|---|
| Compact analog preamp | $80–$200 | Usually a small metal enclosure with simple knobs for gain, level, and tone shaping. | Typically instrument input and output; some models include a balanced output or headphone connection. | Simple to operate, easy to fit on a pedalboard, and useful for basic tonal adjustment. | May offer limited tone-shaping options and fewer live-sound connections. | Players who want a straightforward always-on tone tool or a basic backup preamp. |
| Preamp with direct output | $150–$350 | Often a sturdy metal enclosure with dedicated EQ, gain, and output-level controls. | Commonly includes a balanced XLR output; some designs also provide a ground lift or parallel output. | Can send a balanced signal to a mixing console while feeding a stage amplifier. | Extra connections and controls may be unnecessary for players who only use an amplifier input. | Gigging musicians who need a practical signal path to a PA or recording interface. |
| Tube-equipped preamp | $200–$500 | Typically larger and heavier than compact solid-state units; may include a tube-drive or saturation control. | Connections vary; some models provide balanced output, while others focus on instrument-level input and output. | Can add adjustable harmonic coloration and respond to changes in playing dynamics. | May require a specific power supply, take up more board space, and need more careful setup. | Players seeking adjustable warmth or overdrive characteristics from their preamp. |
| Programmable or multi-channel preamp | $250–$600+ | Usually has more controls, switches, or display functions; enclosure quality and layout vary by design. | May include presets, multiple outputs, balanced output, cabinet simulation, or headphone monitoring. | Allows quick changes between saved sounds and can cover several performance or recording tasks. | More features can mean a longer learning curve, more complex setup, and a higher cost. | Players who need several repeatable sounds or want one unit for stage and practice use. |
Note: Price ranges are approximate and vary by region, condition, and feature set. Check each pedal’s power-supply requirements and output specifications before connecting it to other equipment.
A high-impedance input, often around 1 MΩ, can help preserve pickup attack. Check the actual specification. Specs can mislead.
Active basses may send a hotter signal. Look for enough input headroom or an input pad. Play hard and listen for gritty clipping. It can resemble warmth.
A balanced XLR output can connect to a mixing console. A ¼-inch output can feed an amplifier. Confirm the next device accepts the signal type.
List each device, such as your tuner, compressor, preamp, and amplifier. Compare their input and output levels. Test one connection at a time. A loose cable fooled me once.
A sweepable mid control can target a boxy area near 500 Hz or add definition around 1 kHz. Small labels are easy to misread under dim lights.
Check the enclosure, jacks, knobs, and footswitch. Look for flex, loose controls, or scratchy sockets. Small things matter.
Count the pedal, power supply, cables, and board attachment. Paying more makes sense only when extra features solve a real problem. Easy to overdo.
Test it with your bass and amplifier at rehearsal volume. A bright solo tone may disappear beside guitars and drums. Check for sudden volume jumps.
Choosing the best Bass Preamp Pedal starts with understanding its role in shaping your instrument’s tone and preparing your signal for an amplifier, recording setup, or performance system. Consider the sound you want, the styles you play, and the situations in which you perform. These needs will help you decide which preamp type and tone controls are useful, from straightforward level and EQ adjustments to more flexible sound shaping.
Before choosing, check that the pedal’s inputs, outputs, and power requirements suit your bass and the rest of your signal chain. Compare its connectivity and controls with your setup, and consider whether it is practical for rehearsal, recording, or live use. Build quality, ease of operation, and budget also matter: the right choice is one that delivers the features you need, fits your playing routine, and provides dependable performance without paying for functions you are unlikely to use.